
How to create and configure table layout (Tables and areas)
Adding Tables and Areas
- Access Table Number Setting from Settings tab
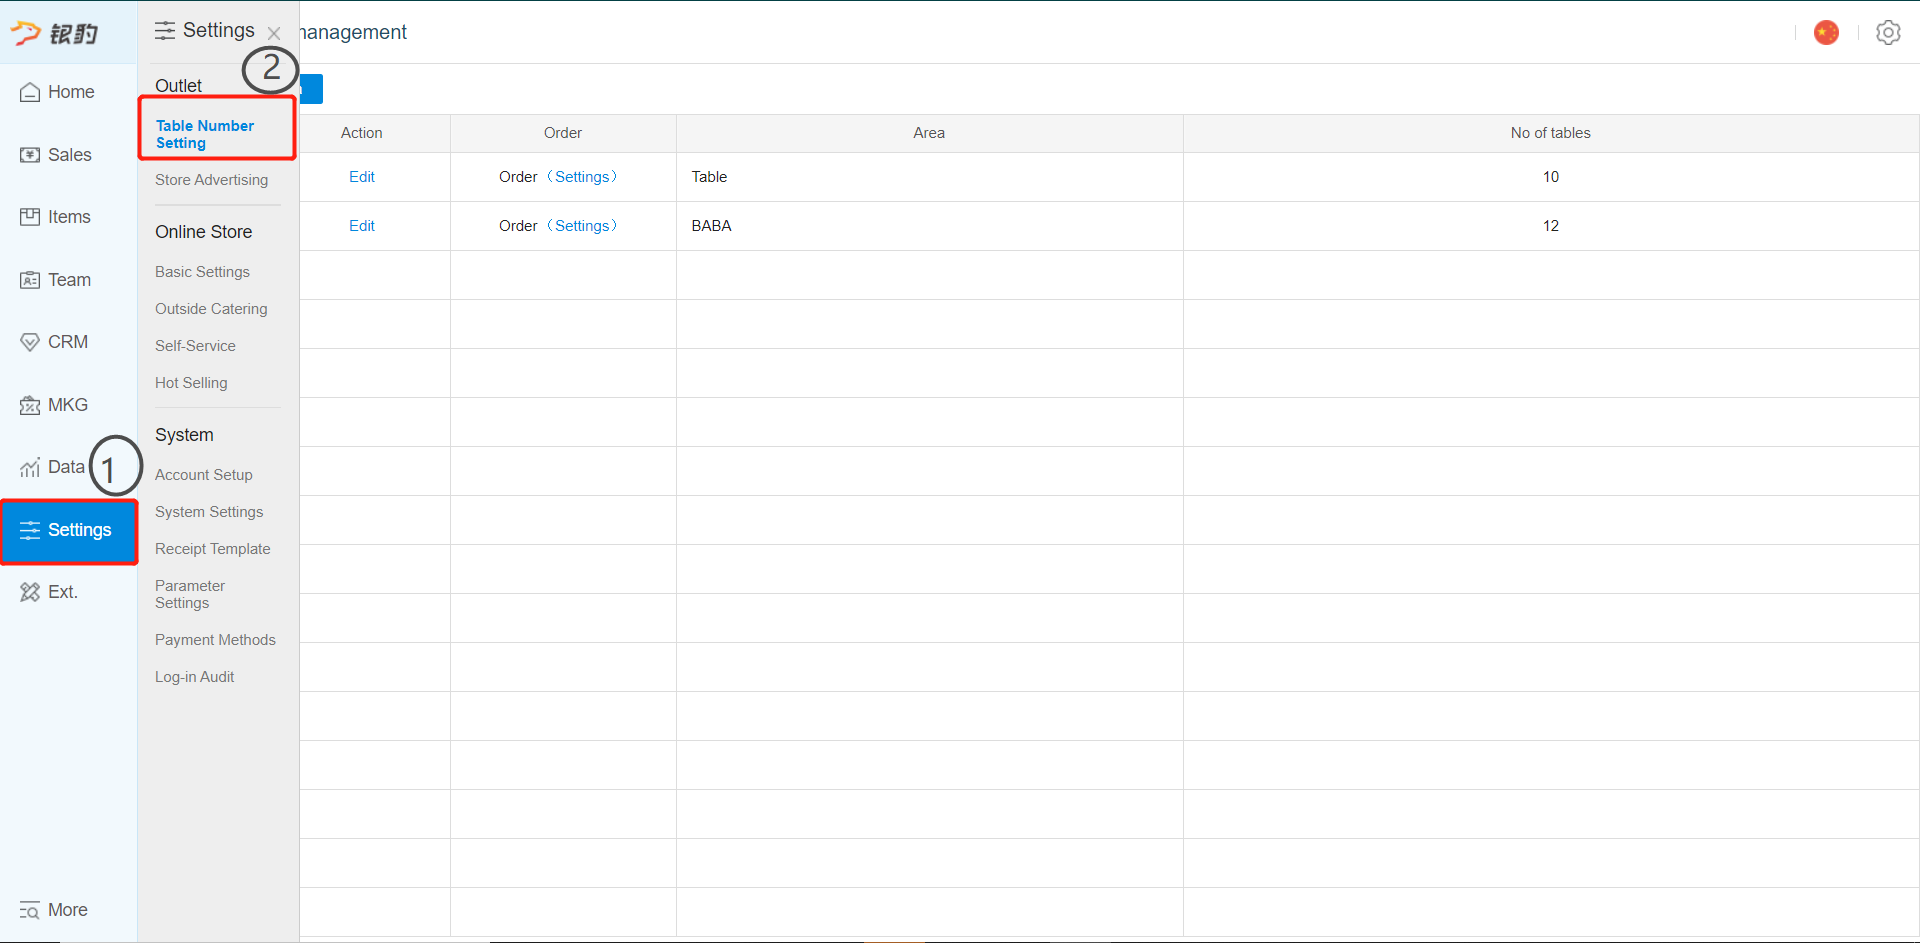
- Click on Add Area
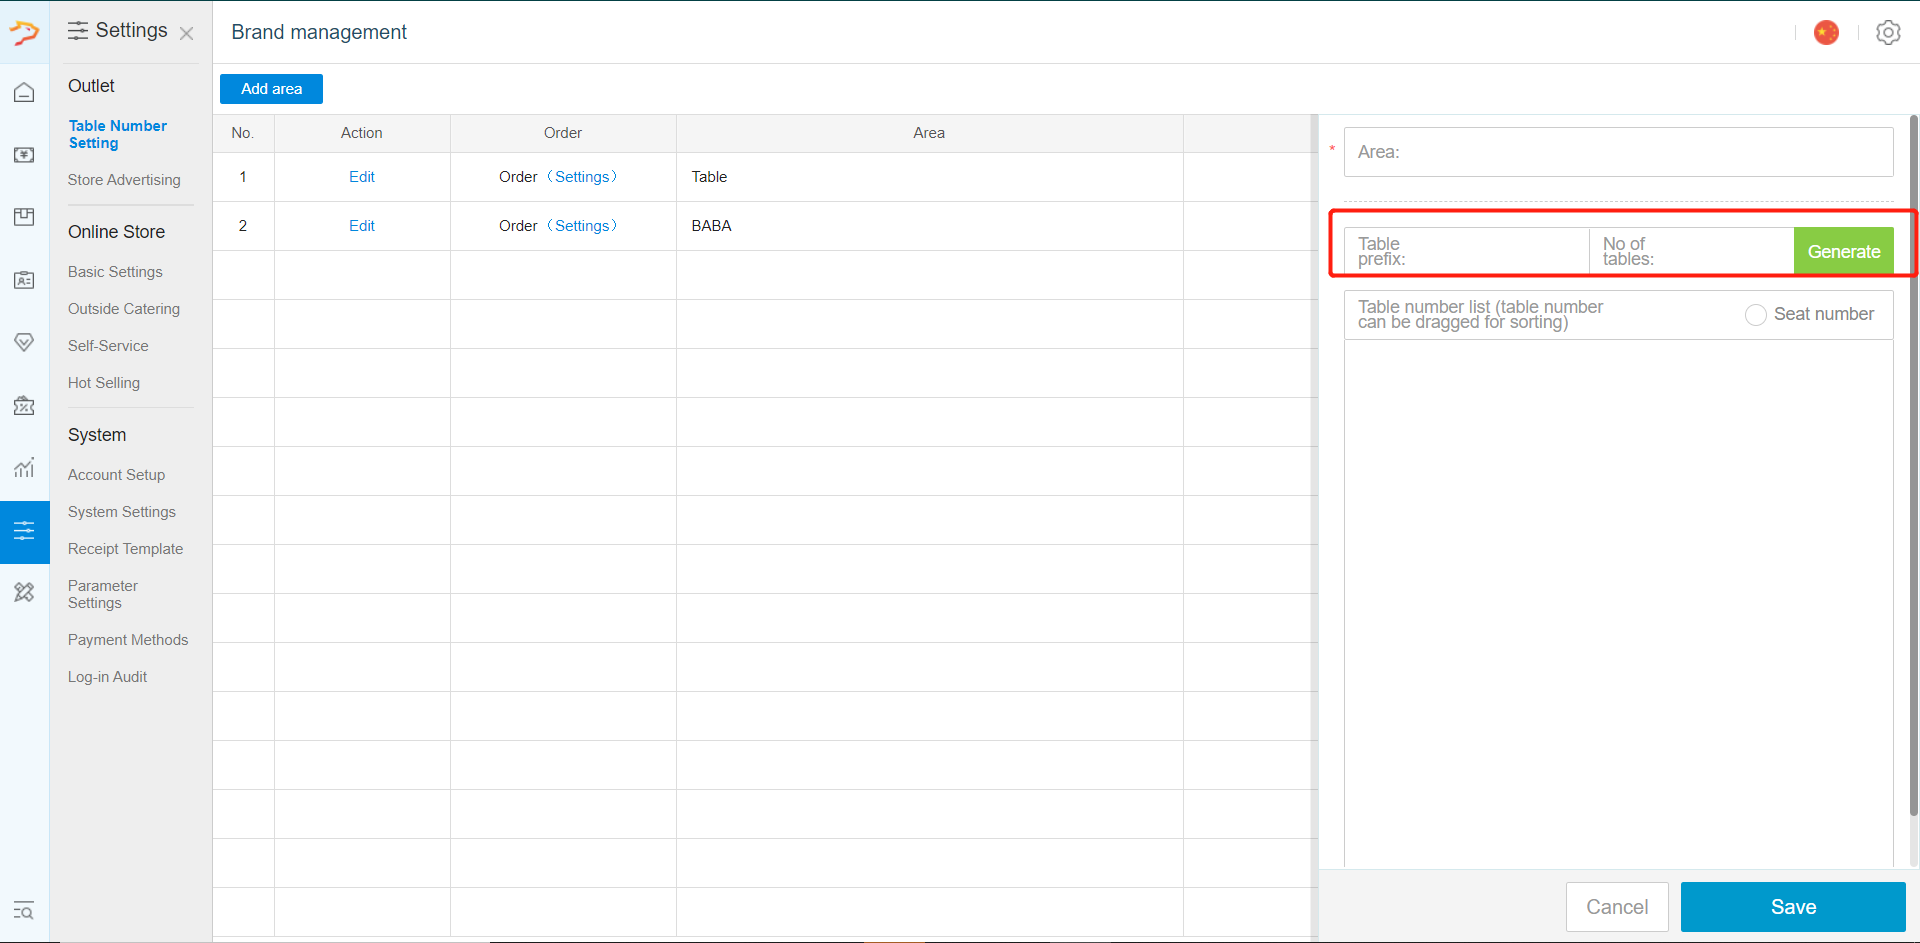
Area: Name for area; example, Balcony
Table Prefix: Letter in the table number to indicate location, for example, B for balcony
No. of Tables: How many table in that area; example, 10
Generate: Create tables based on value given; example, B1, B2 to B10
Table number list (table number can be dragged for sorting)
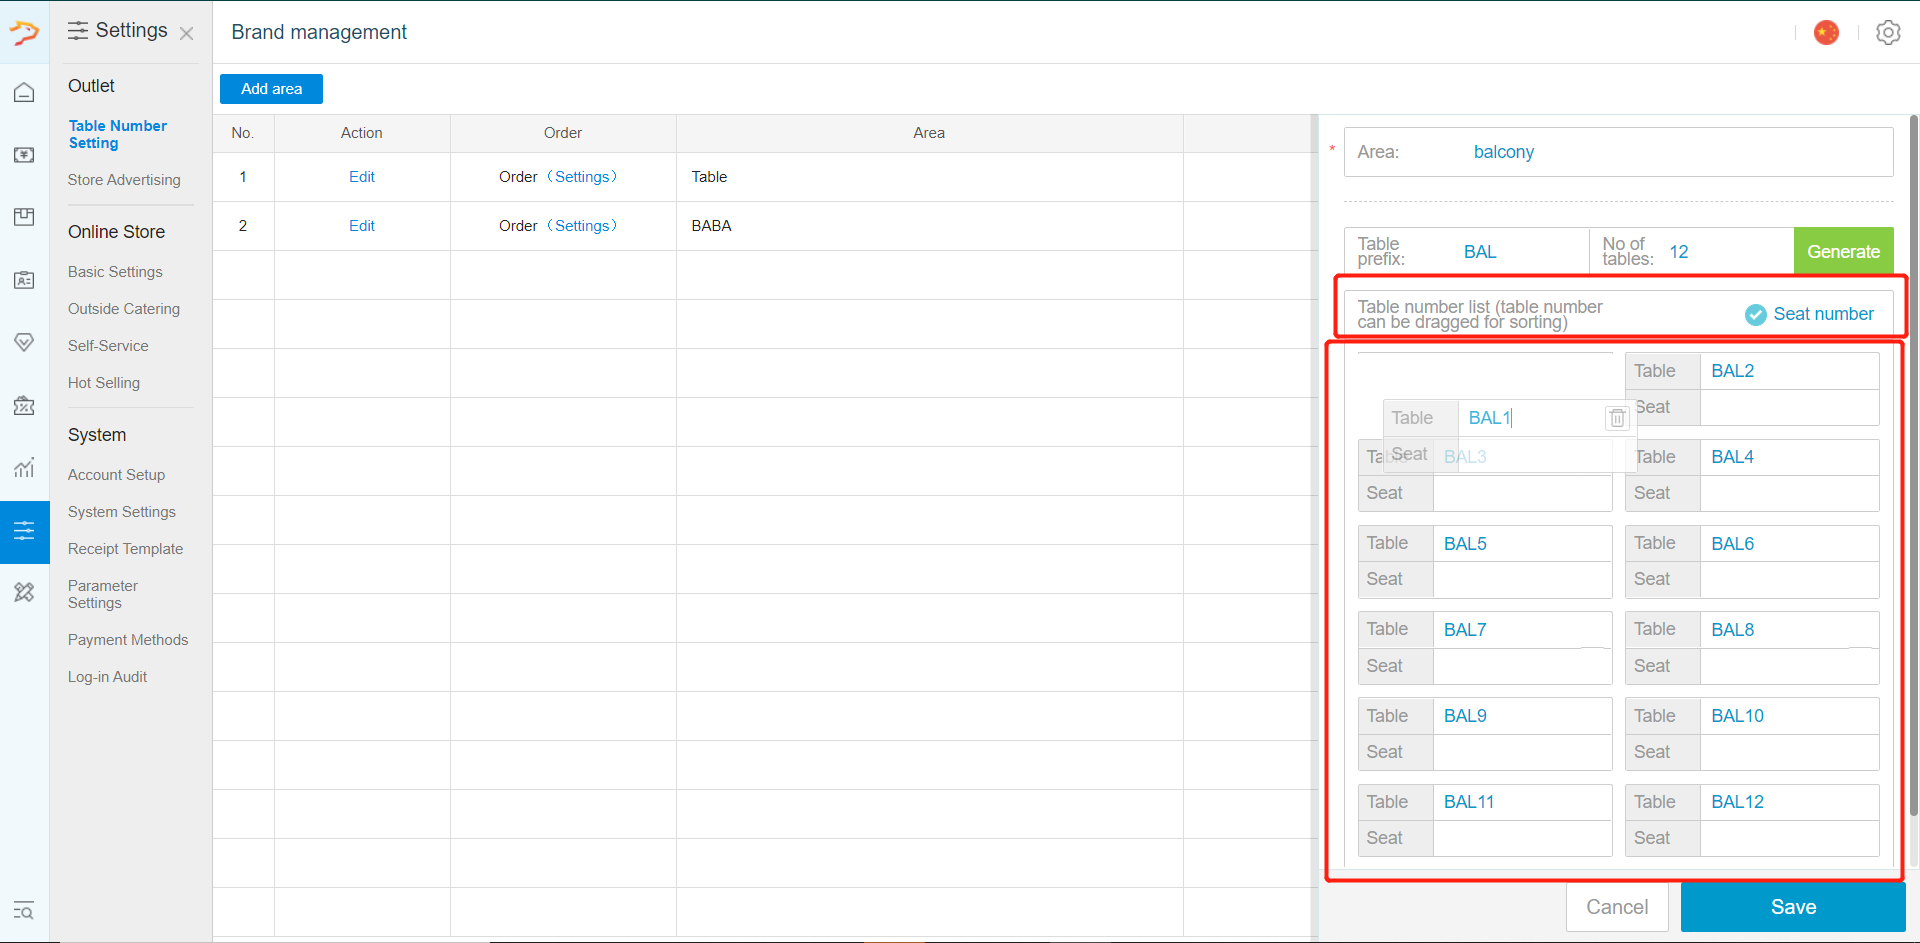
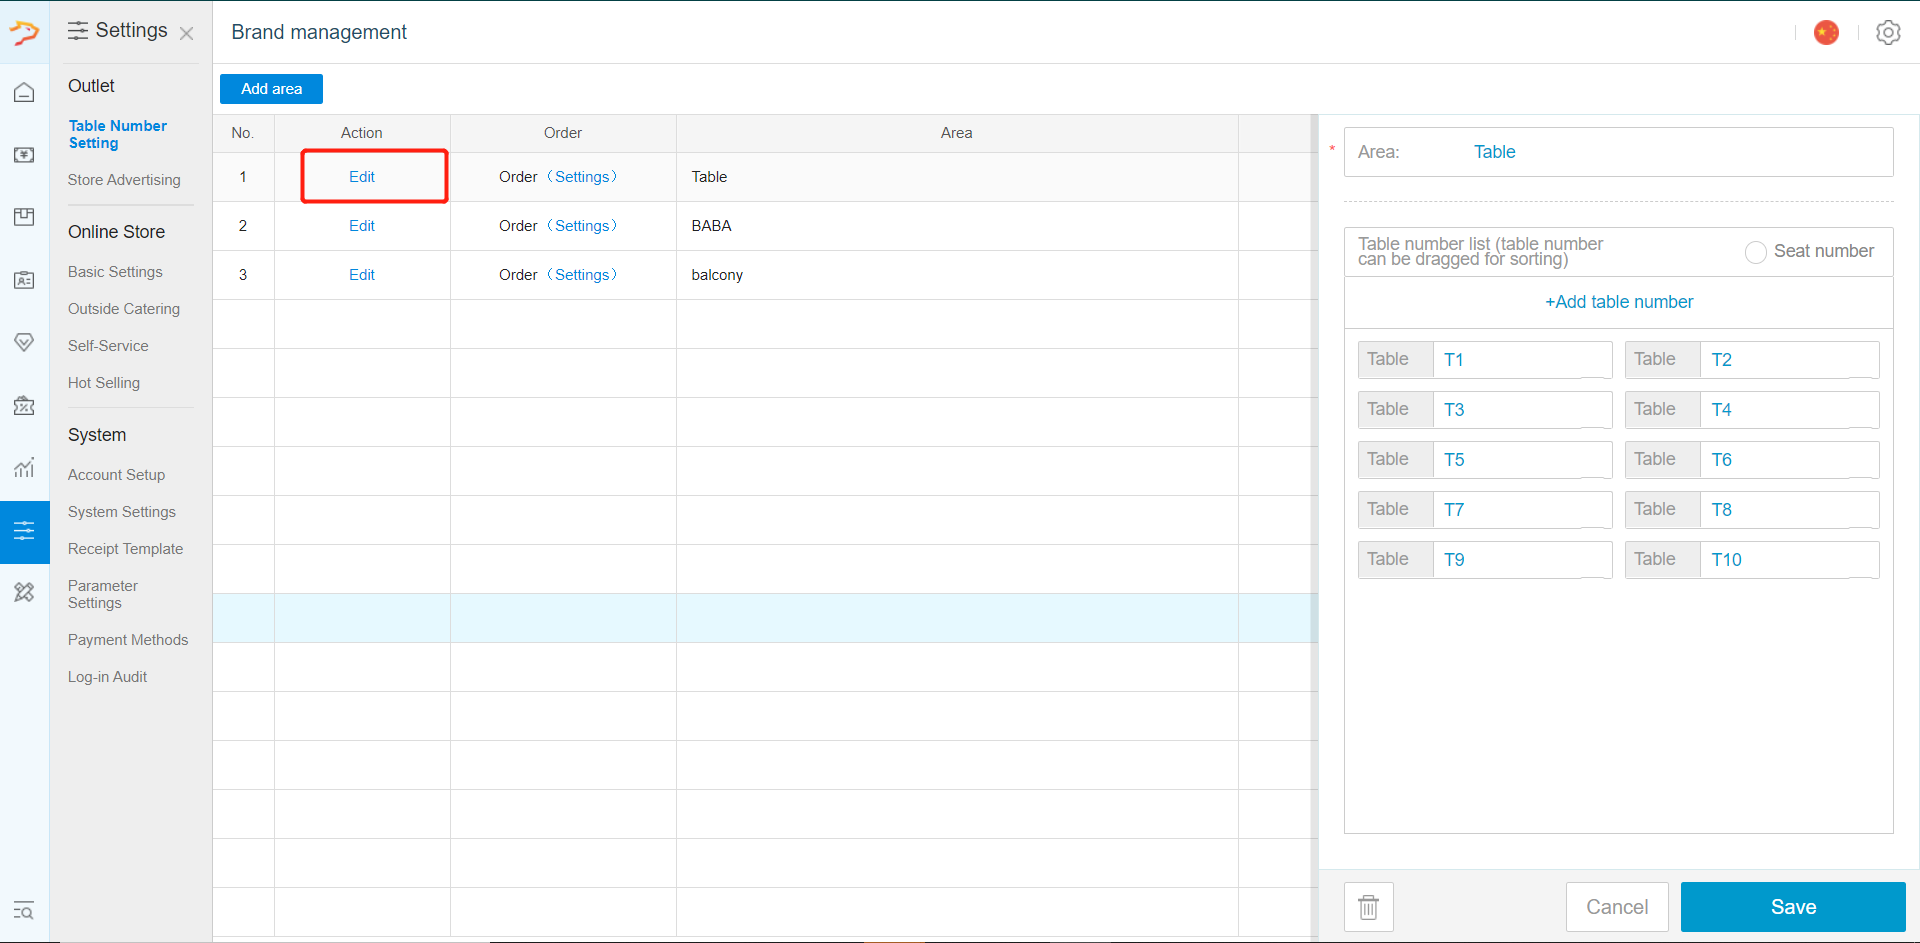
- Clicking on edit on the created area allows you to rearrange the sequence of table, or to delete table(s)
Need help? WhatsApp us +65 8508 9618
Any Enquiries? Message us!
If you have any question or concern, please fill below and we’ll get back to you shortly.
Get in Touch with Us


7 Holland Village Way, #05-03/05 Tower Lobby B, One Holland Village, Singapore 275748

Call us for a Quote

+65 8771 8700
+65 6850 5177
Stay Connected
Copyright © Weebo Pte Ltd All Rights Reserved.